Getting Started
Welcome to our quick start guide; we're so excited to have you here. Spin was built to make things easier on DJs and their clients, so we even created this guide to help simplify the process and clear up any confusion that may arise.
Getting Started Checklist:
To get the full gist of Spin, we definitely suggest following this tutorial, but there are features not listed, and some of these can be excluded for a quicker demo.
Register a Business Account
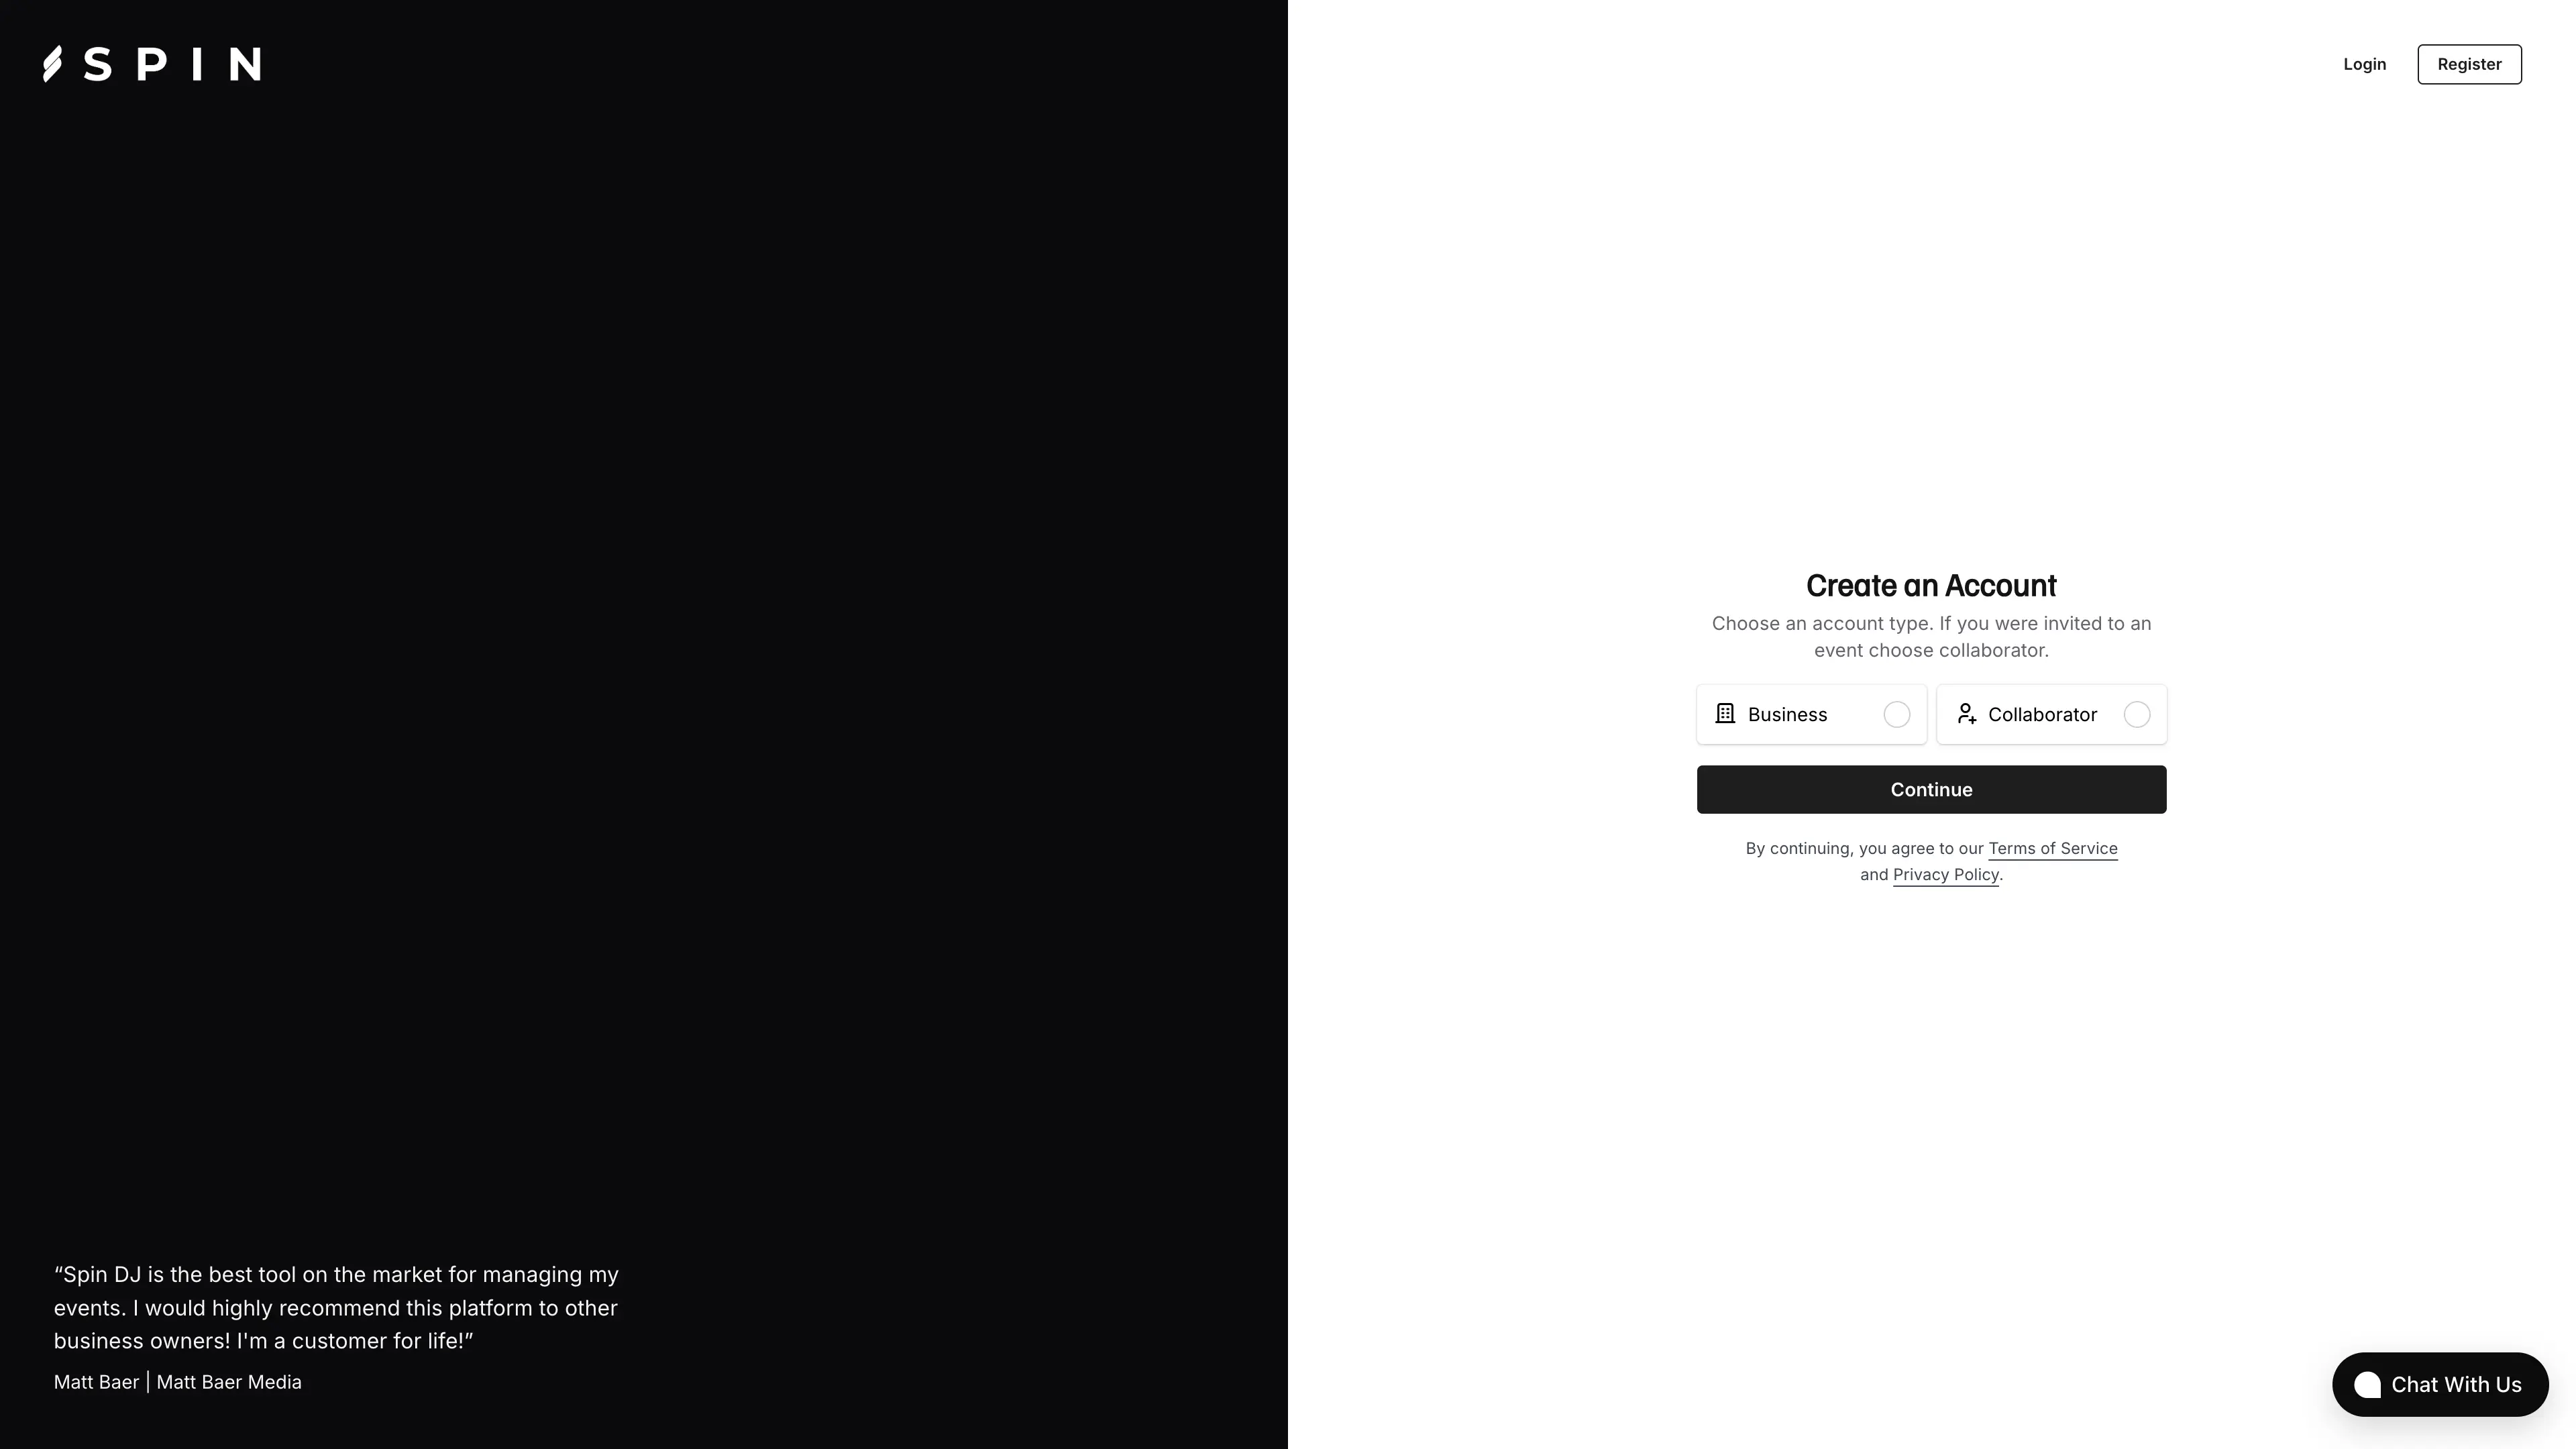
If you haven't signed up for Spin yet, head over to app.spindj.io to create your account.
Create a Business (and Start Trial)
Once you register for a business account, a setup modal will guide you through configuring your primary business details. You'll be asked to provide the following information:
- Name
- Phone number
- Address
After completing the form, you'll be prompted to start your no credit card required 30-day free trial. Once the trial has started you'll be taken to your dashboard, where you can begin building your business with Spin. ❤️ 🎧
Setup Payment Settings
Payments are pivotal to a business, so we support credit card payments, ACH payments, and mobile wallet payments. To set up your payment settings, head to the Payments settings page.
To enable credit card payments, you'll toggle the switch on the credit cards section at which point you'll be taken to Stripe, our payment partner.
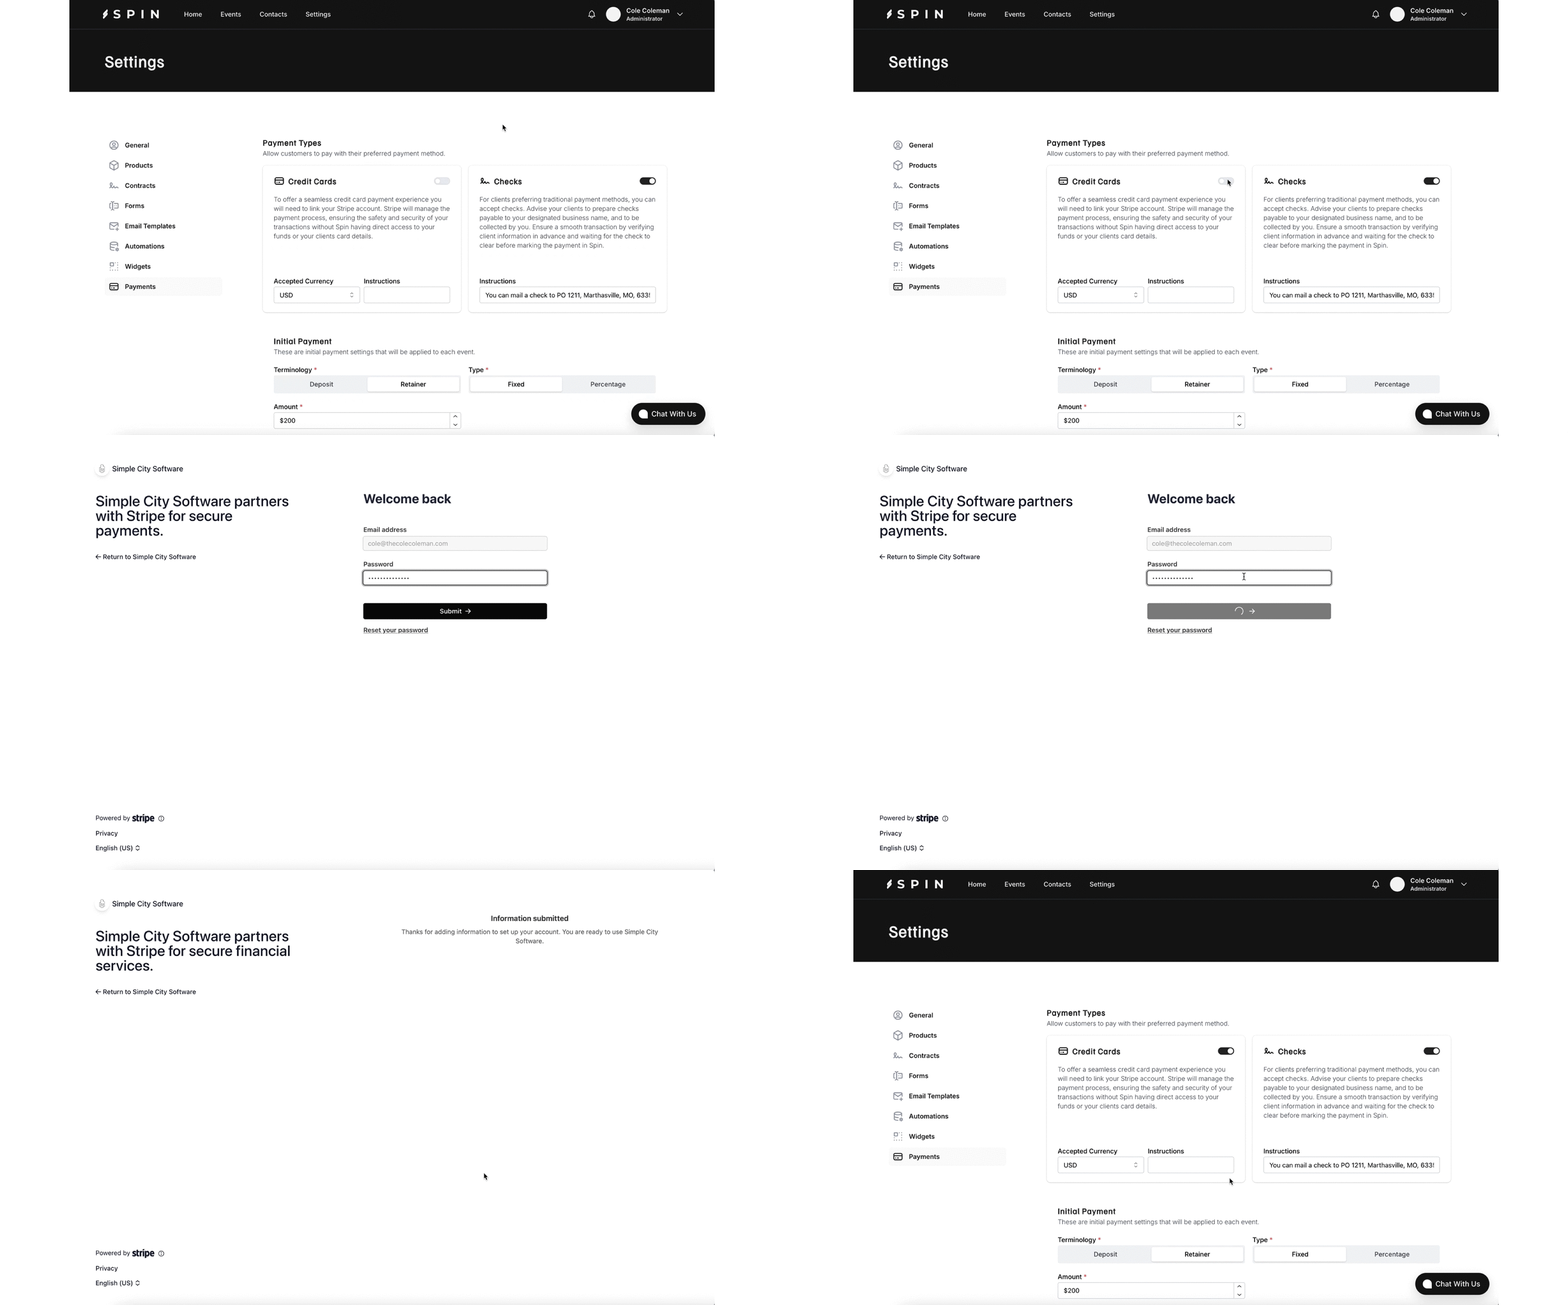
Once you've completed Stripe's setup, Stripe will connect with Spin's server, so we can save your Stripe ID. Stripe will then send you back to Spin's settings page, and you'll see your credit card payments are enabled.
Note: You may also take this time to edit your other payment settings; these settings can be changed at any time.
Build Your First Form
Next, we'll create our first form. In Spin, forms function as customizable questionnaires and can be set to either plain text or music template types. You can design a single form and attach it to any or all of your events, and you can even attach multiple forms to a single event as needed.
Before we jump in, though, some best practices:
- Create Small, Single-Purpose Forms: Since multiple forms can be used for each event and shared across different event types and packages, we recommend designing concise, single-use forms. This approach enhances flexibility and manageability.
- Separate Music and Questionnaire Forms: Spin’s forms integrate directly with the library features to automatically create playlists. To optimize this functionality, keep your music forms distinct from your questionnaire forms.
- Organize Music Forms by Category: Structure your music forms based on your desired playlists. For example:
- Ceremony Songs
- Reception Songs
- Do Not Play List
- Request List
By categorizing your forms this way, Spin can generate separate crates/playlists within the Library feature. Additionally, this organization allows you to reuse specific forms across multiple event types, streamlining your workflow.
Now, let's build some forms!
In Spin's Settings, we'll head to the Forms section and click the Create Form button at the top of the page.
Create Form button highlighted.Once the modal opens, we can fill out the first step, which will ask us for the name and description of the form.
After filling out the form name and description, we'll click the Next button and head to Step 2, which will ask us for information on the first fieldset.
Since this is a wedding reception music form, we'll designate the first fieldset as the First Dance set. Additionally, because it involves music selections,
we'll set the fieldset type to Music. When you select the Music fieldset type, the form is pre-configured with the following fields:
- Song Name
- Song Artist
- Note (default)
Note: The third field is set to Note by default, but you can customize it to better fit your needs.
This setup streamlines the process of adding music selections, allowing you to focus on building your DJ business without having to focus on the minute details.
Now that you've completed your form setup, you have two options:
- Add Another Fieldset: Continue enhancing your form by adding additional fieldsets to capture more information.
- Save the Form: Save your current form and proceed to the dashboard.
For the sake of brevity, we'll save this form now and move on. However, you can always return later to finish customizing your form!
Build Your First Contract
Now that you've set up your forms, you can create a quick contract to attach to either your services or events for clients to electronically sign.
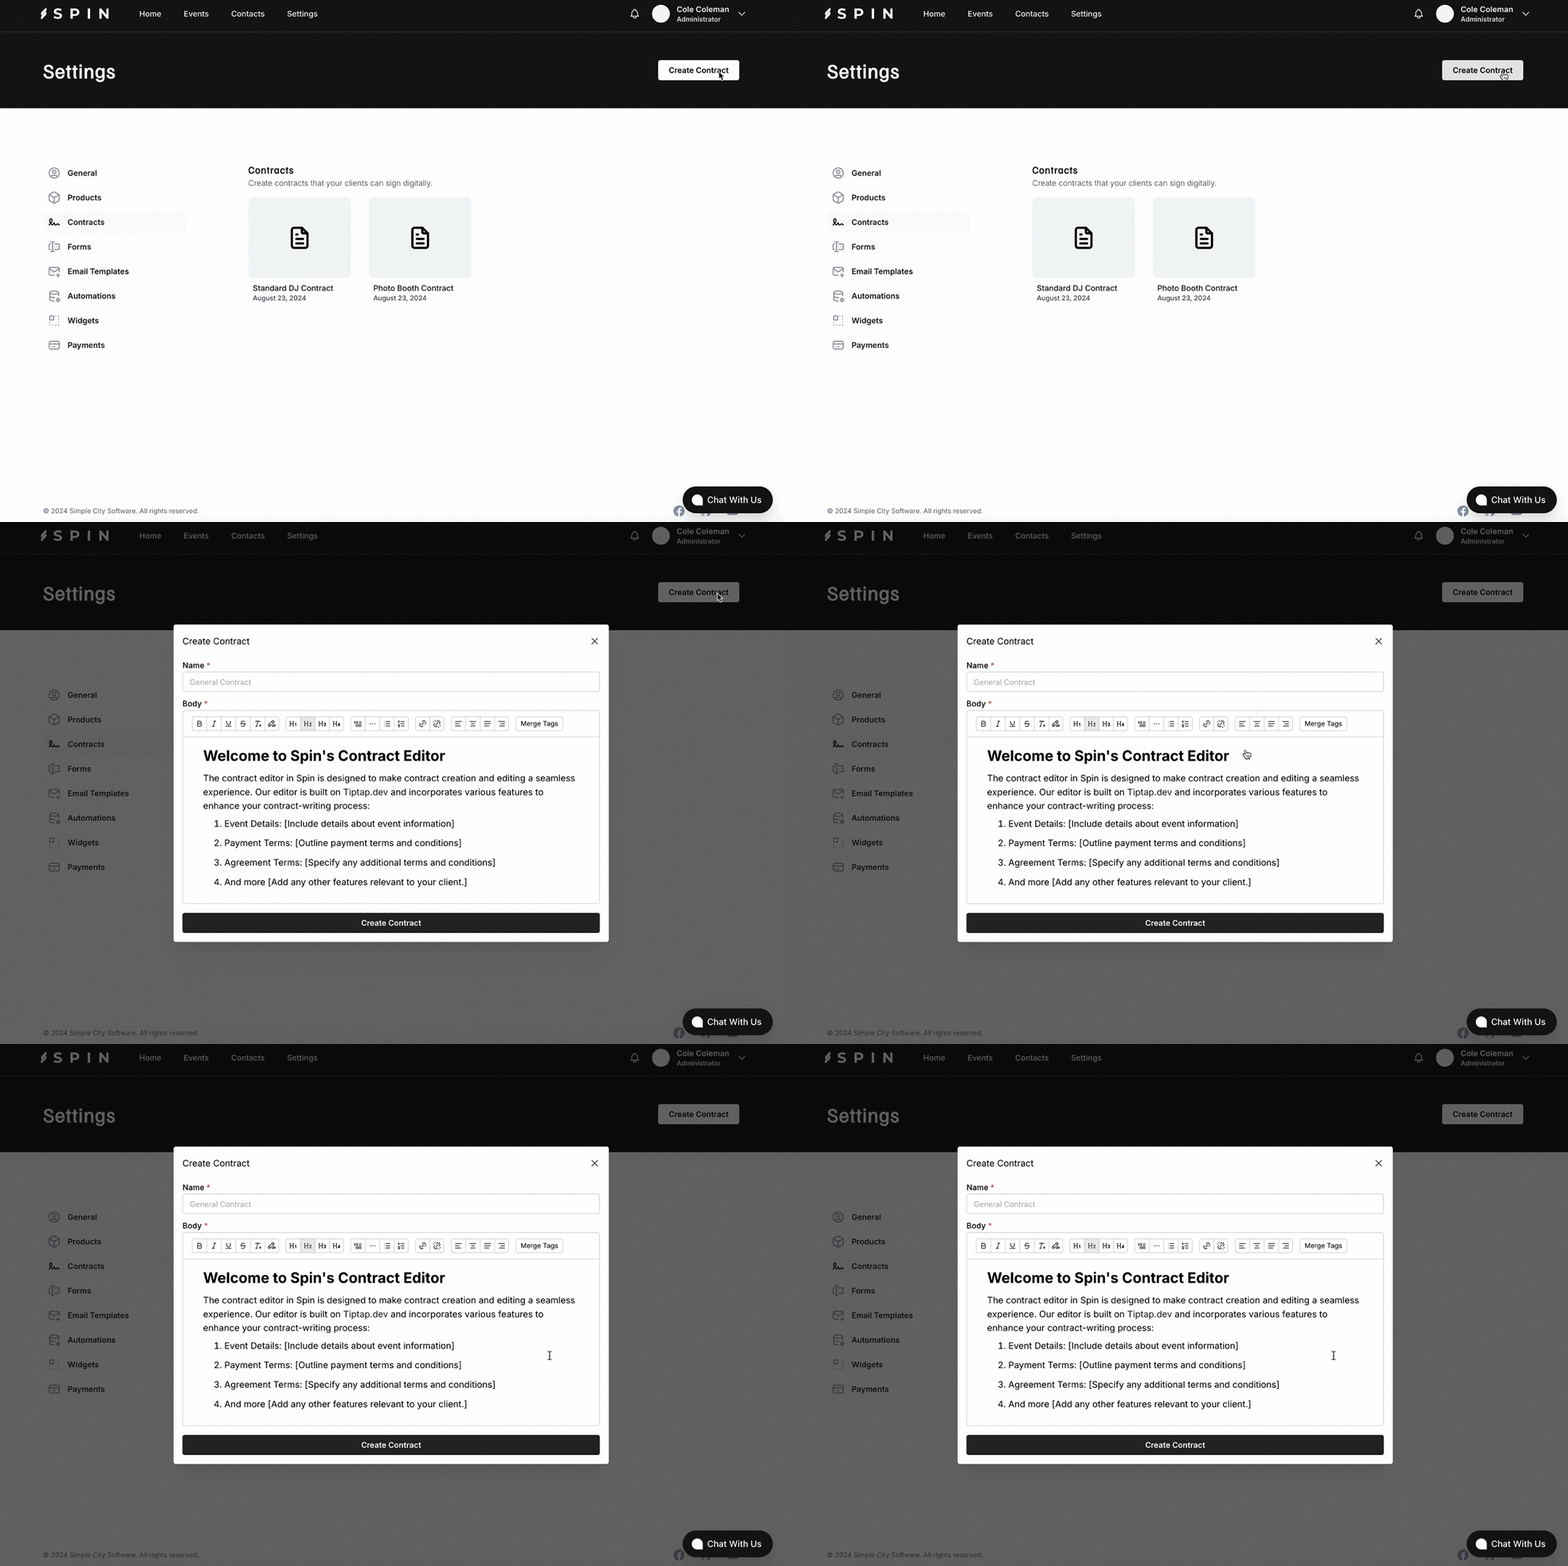
Create Contract button highlighted.On Spin's contract page, click on the Create Contract button to bring up the Contract Creation modal.
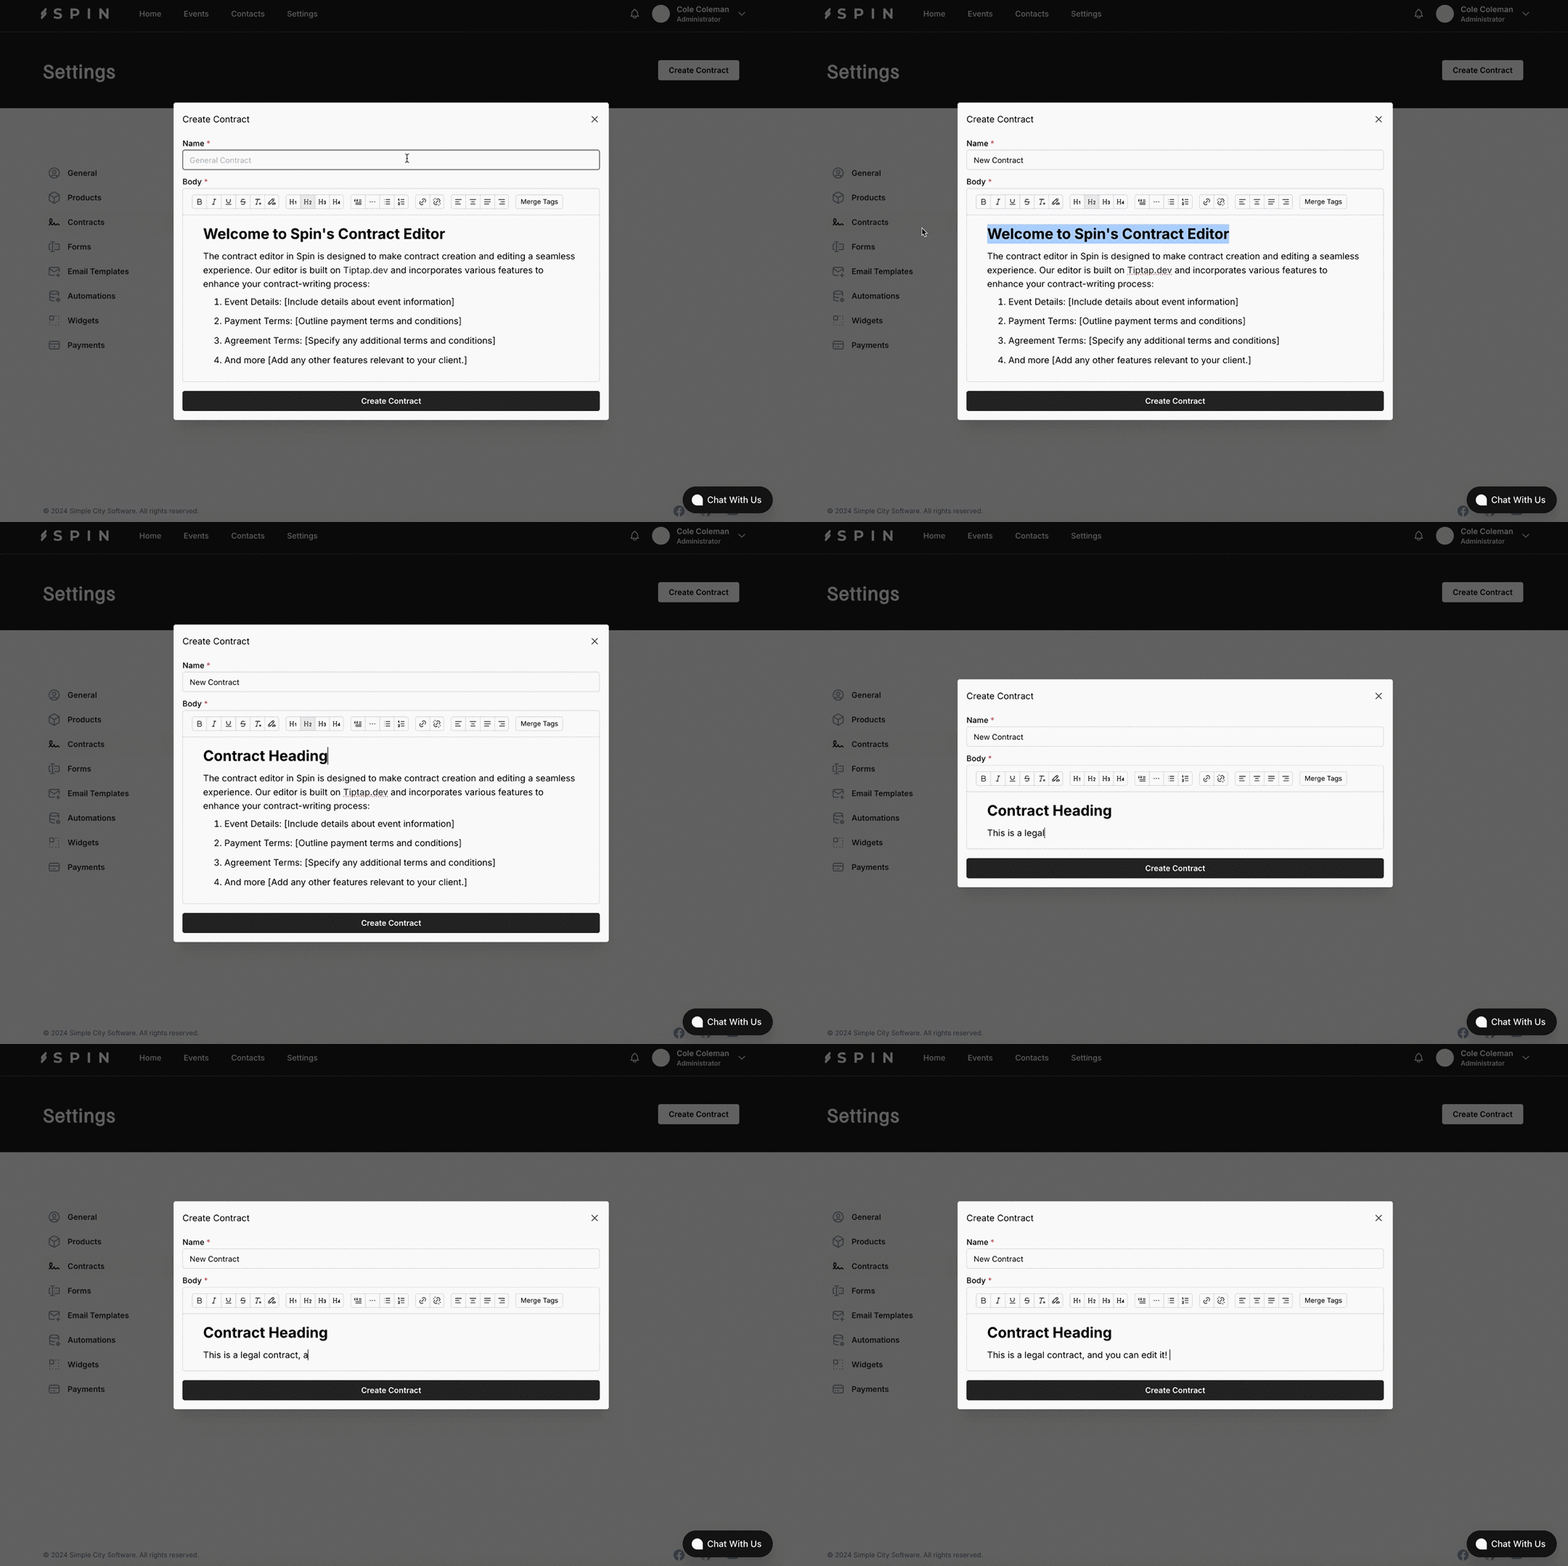
Use the built-in editor to write the terms of your contract. Include essential sections such as:
- Services Provided
- Payment Terms
- Cancellation Policy
- Liability Waiver
The contract editor offers a comprehensive formatting suite, enabling you to create beautifully formatted and professional contracts with ease.
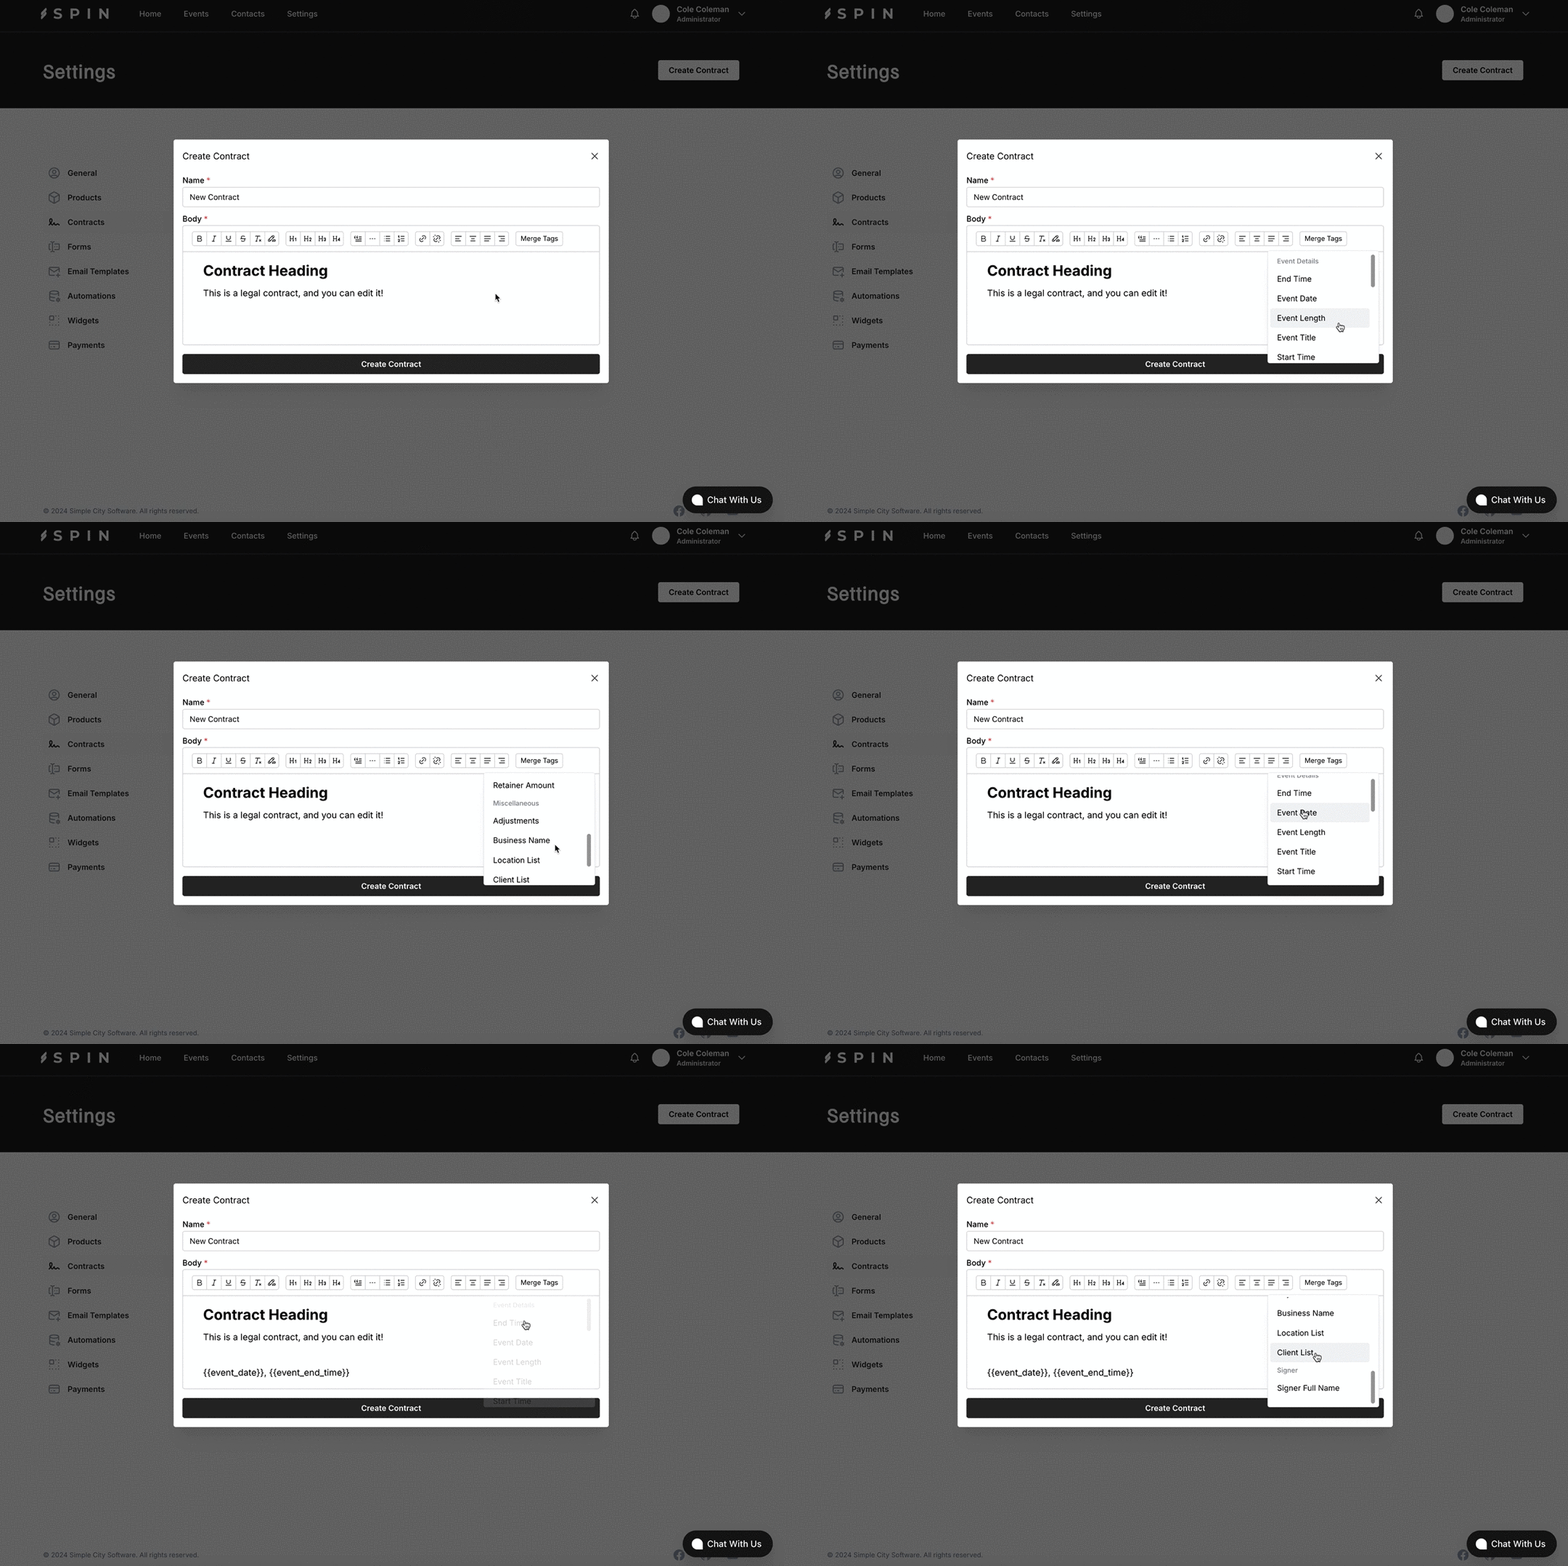
A nice-looking heading loses its impact if it doesn't incorporate live data from the event. Spin's contract editor features a Merge Tag menu to help you create dynamic and personalized contracts effortlessly.
Merge tags are placeholders that automatically populate with live data from each event. For example, the merge tag {{event_date}} will insert the event's date pulled from the event's details.
- In the contract editor, click on the
Merge Tagbutton to view the list of available placeholders. - Select the desired merge tag to have it appear in your contract.
Benefits of Using Merge Tags
- Personalization: Tailor each contract to the specific details of the event and client.
- Efficiency: Save time by automating the insertion of repetitive information.
- Accuracy: Minimize errors by ensuring that all dynamic data is correctly populated.
Tip: Regularly update your merge tags to include any new data fields that can enhance your contracts and client interactions.
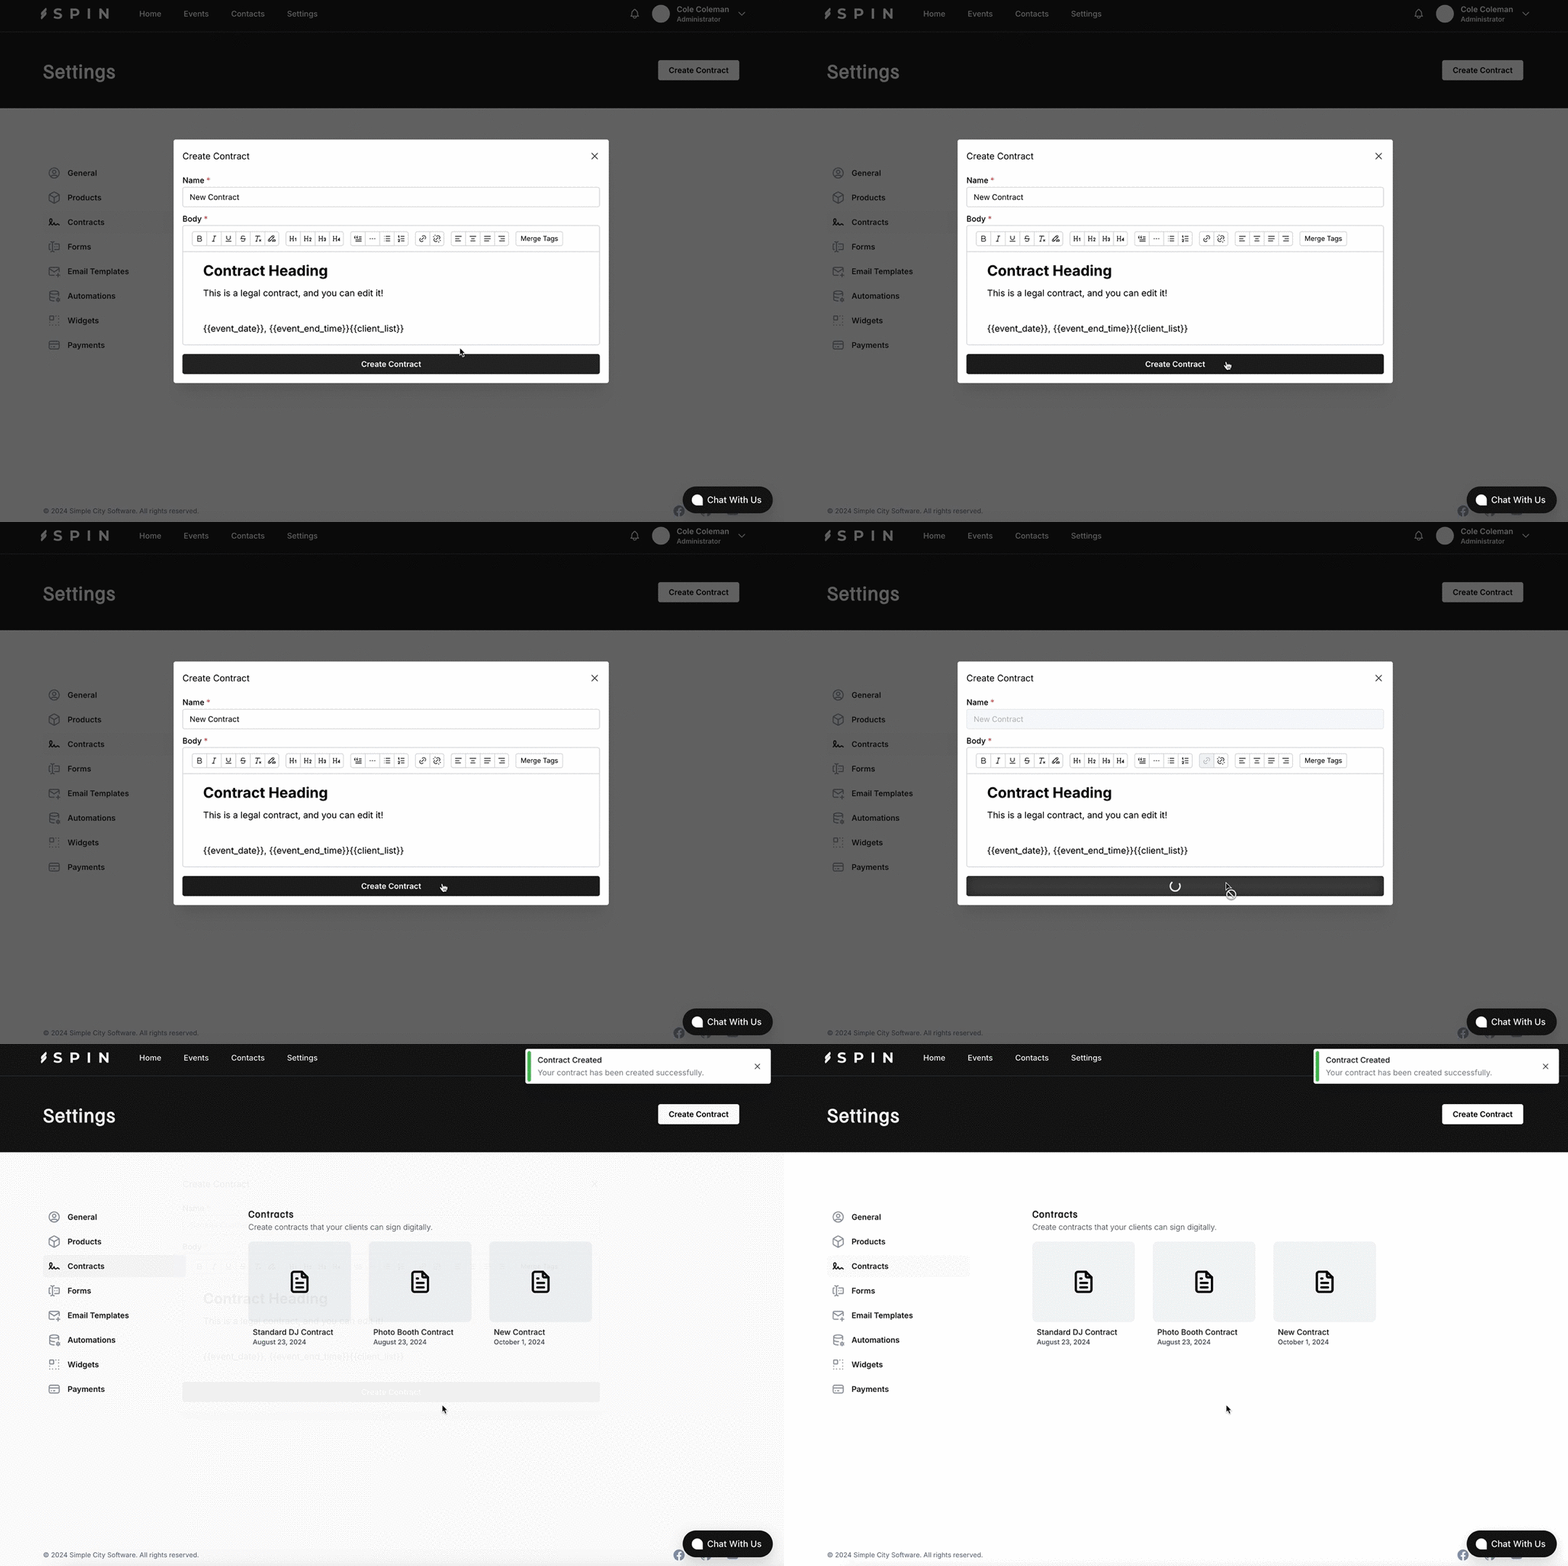
Once you're satisfied with your contract, click the Create Contract button, and it will appear in your settings!
Build Your First Product
Now that we have both a contract and a form, we can attach them to a product. Spin offers several types of products, including:
- Add-Ons
- Adjustments
- Packages
- Services
In this guide, we will focus on creating and utilizing a Service.
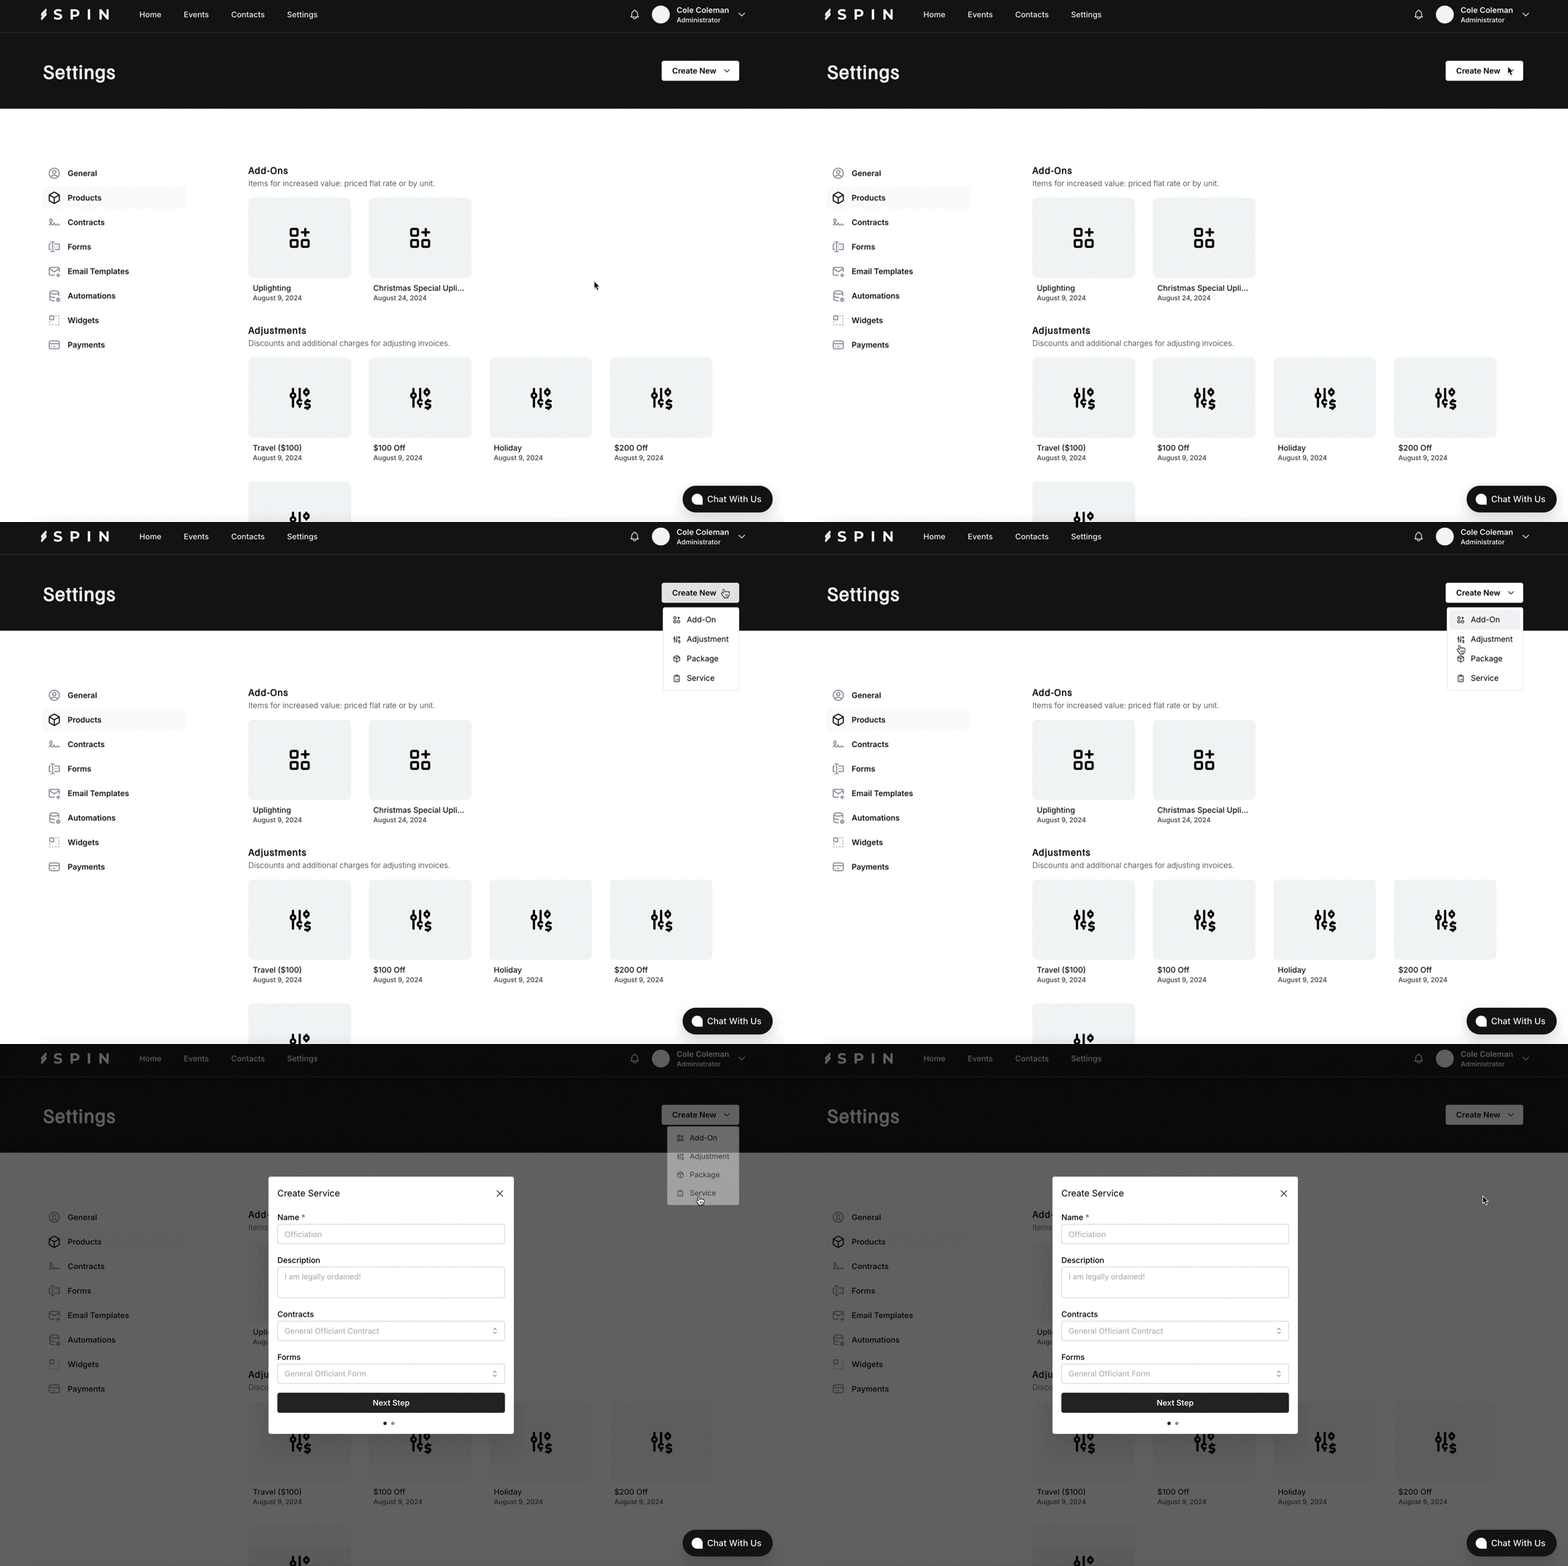
Navigate to the Products page in the settings, then click the Create New button at the top and select Service from the dropdown menu. In the first step,
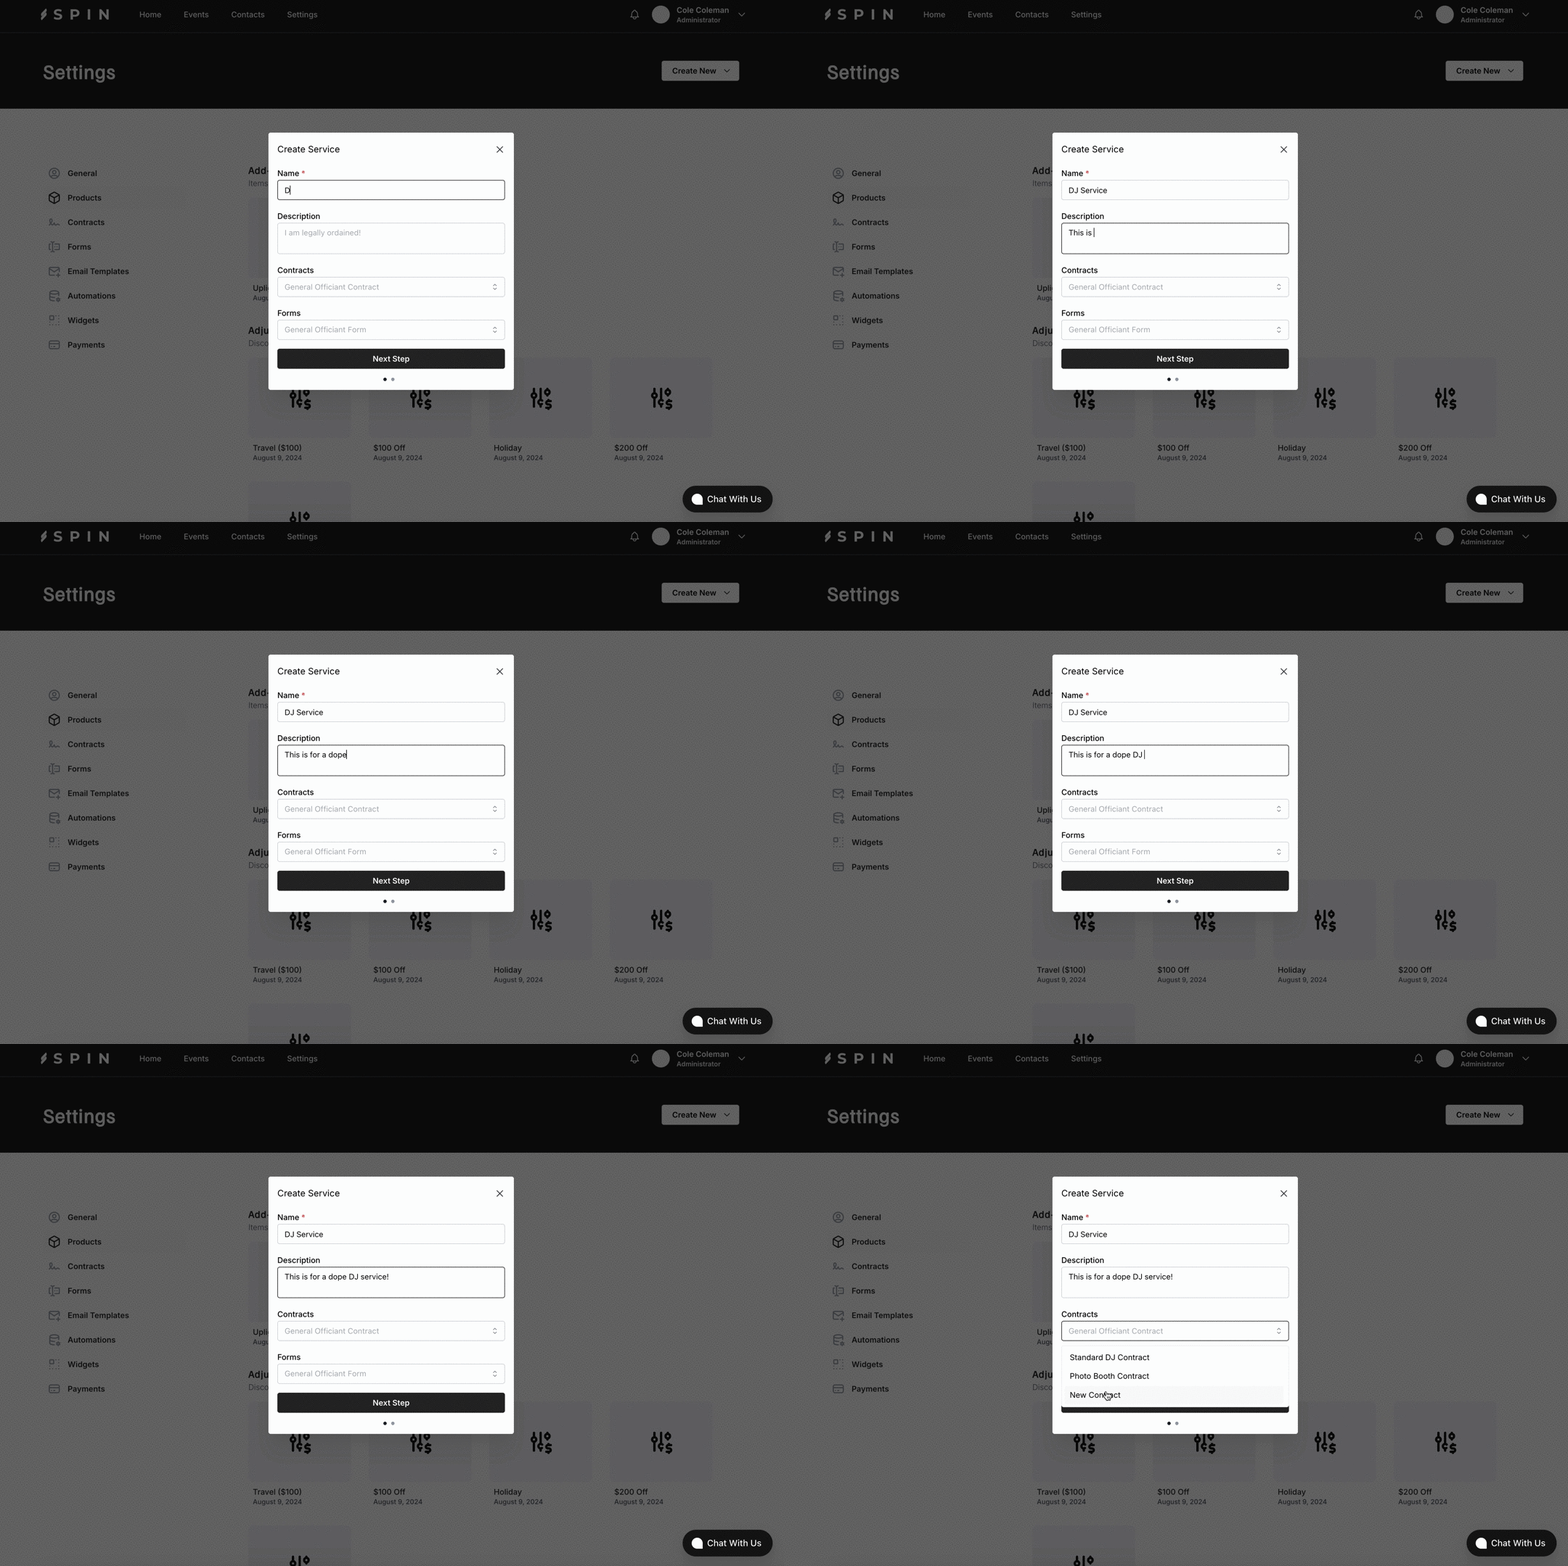
you will need to fill out the following fields:
- Name
- Description
- Contracts
- Forms
With Spin, you can attach contracts and forms to services and packages. These contracts and forms will automatically apply to every event that includes the respective service and/or package.
Next, we will establish the pricing for our service.
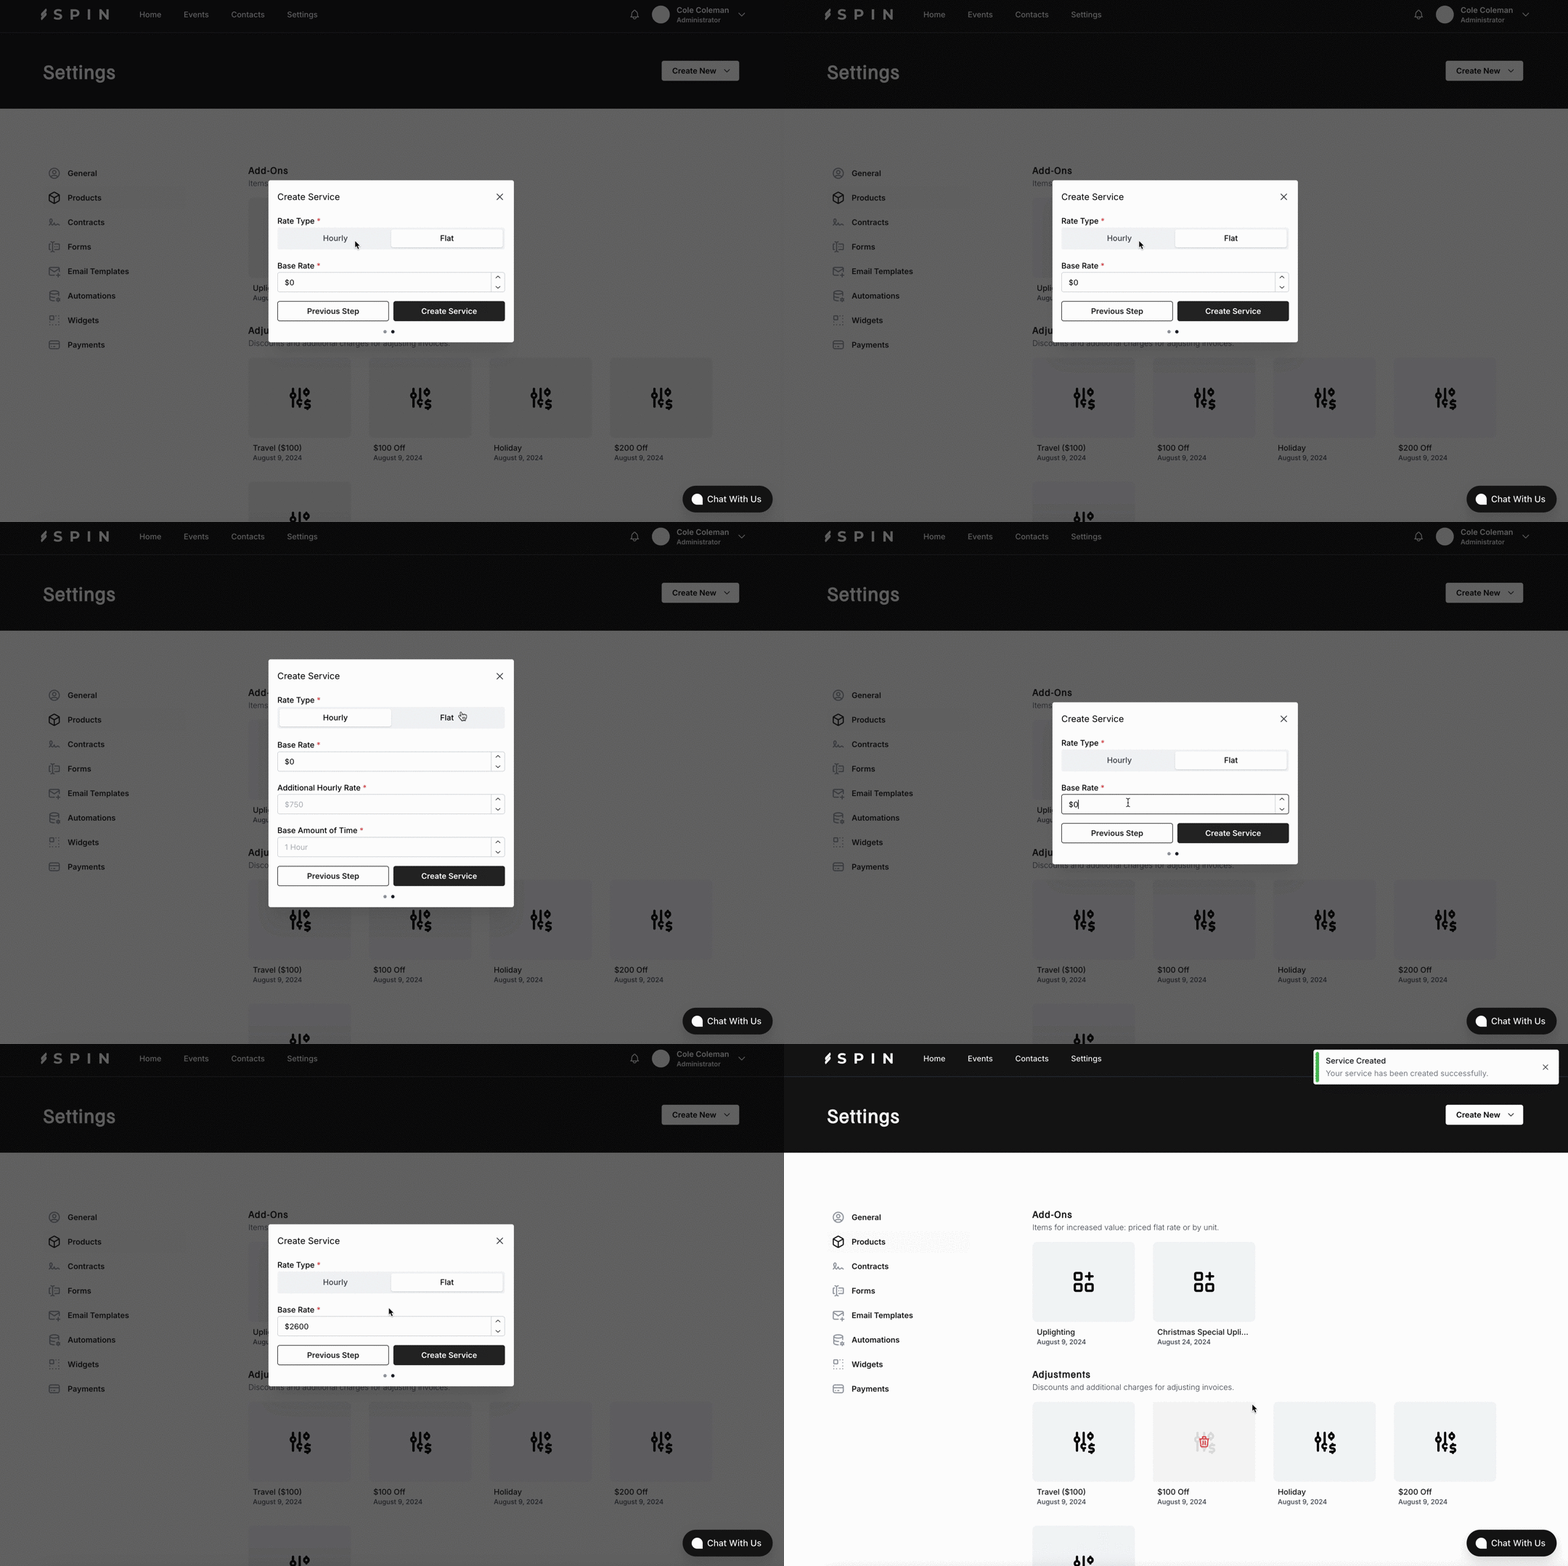
Spin offers two pricing options for services and packages: Hourly and Flat.
- Hourly: Set a base rate for a specific number of hours, with an additional rate for each extra hour.
- Example: $2,000 for a 4-hour base time and $100 per additional hour.
- Flat: Charge a fixed rate regardless of the event's duration.
Once you've configured your pricing, you can save the service. With your service created and forms and contracts attached, your business setup and payment settings are complete. You are now ready to create your event.
Create Your First Event
With all the setup complete, we can now create our first event! Return to the dashboard and click the Create Proposal button. A modal will appear, prompting
you to enter the event details.
After entering the basic event details, you will need to create a location for the event. Click the Add location button to open a modal where you can
provide the location specifics. Once completed, click the Create Location button again to save. The newly created location will then be available in the
dropdown menu within the event details section.
Additionally, creating a location adds it to the Contacts page under the Locations tab, where you can view comprehensive details, including:
- Total Event Value
- Total Event Count
- Days Since Last Event
- Upcoming Events
- Notes
Note: You can also create a location directly from the Contacts page.
With the basic details in place, we can proceed to attach the service we created earlier to the event. In Spin, products can be designated as either mandatory or optional. For instance, our service is mandatory, preventing clients from modifying it. Conversely, if you wish to offer additional options, such as extra speakers, but are unsure if the client will opt for them, you can mark them as optional. For this tutorial, we will keep the service mandatory. By selecting the service, the already attached contract and form will automatically attach to the event — simple and efficient.
Next, continue through the remaining steps by adding any additional automations, adjustments, contracts, etc. Finally, review the proposal details to ensure
everything is accurate. Once satisfied, click the Create Proposal button to finalize and create your event!
Invite a client
Now that we have our event created we can invite a client. To do so enter their email address, and Spin will send them an invitation on your behalf. Invites may also be sent from the event details page. They will be guided through creating a profile, selecting their add-ons, signing the contract, and paying the retainer.
A few notes:
- Once the retainer is paid, the event status changes from "Proposal" to "Event".
- The retainer/deposit details, including terminology and amount, are configured in your Payment Settings.
- After the contract is signed, the merge tags are locked. This ensures that our contracts are enforceable and legally binding. If any details need to be changed, we recommend removing the existing contract from the event and adding a new one for re-signing.
Interact With Your New Event
Your event has been successfully created and is now available in your account. To locate it, navigate to the Events page and view it on the calendar. From there, you can edit event details, complete forms, manage playlists, record payments, share the event with additional collaborators, and access other features.
Posted By
Cole Coleman
CEO @ Simple City Software

